

How To Set Up Automatic Email Send In Outlook
How to send a schedule recurring email in Outlook?
In Microsoft Outlook, you can easily send a schedule recurring appointment, meeting or task to others. But if you just want to send a schedule recurring email without any appointment, meeting or task, how can you do? Unfortunately, Outlook provides no feature for sending schedule recurring email, but in our tutorial, we will show you how to send a schedule recurring email in Outlook.
Send a schedule recurring email in Outlook with VBA code
- Part 1: Create a new appointment
- Part 2: Create a new category
- Part 3: Set the Recurrence
- Part 4: Use the VBA code for sending the Schedule Recurring Email
Easily send schedule recurring emails in Outlook with an amazing tool
Send a schedule recurring email in Outlook with VBA code
This tutorial is divided into four parts, you will succeed to send a schedule recurring email after finish these parts. Please do as follows.
Part 1: Create a new appointment
1. Please navigate to the Calendar view by clicking Calendar in the Navigation Pane, and then create a new appointment by clicking New Appointment under Home tab.

3. In the Appointment dialog under Appointment tab. You need to:

| A: Type in the Subject | B: Enter the recipients' email addresses in the Location |
| C: Configure the Start time and the End time | D: Select the reminder under the Reminder drop-down list. If you choose 15 minutes, it means it will remind you 15 minutes early when the email is sent. |
| E: Compose your Appointment body. |
Note: The Appointment Subject will become the recurring email subject; and the Appointment body will become the recurring email body when the recipients received the email.
Part 2: Create a new category
Now you need to create a new category named " Send Schedule Recurring Email " as follows:
1. In the Appointment dialog, please click Categorize > All Categories in the Tags group under Appointment tab.

2. When the Color Categories dialog popping up, please click New button. In the Add New Category dialog, type " Send Schedule Recurring Email " in the Name field; and then choose a color in the Color drop-down list. Then click OK.

3. Then you will see the " Send Schedule Recurring Email " category is listed out, please check the box, and then click OK button.

Part 3: Set the Recurrence
Now, it is time to set the recurrence for the appointment.
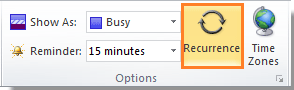
1. Click Recurrence in the Options group under Appointment tab. See screenshot:
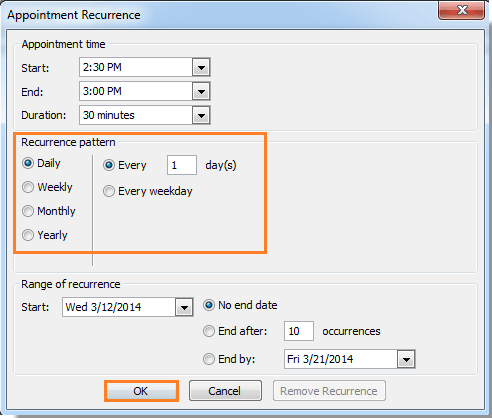
2. In the Appointment Recurrence dialog, configure your Recurrence pattern. If you need an end time, please configure it under Range of recurrence. And then click OK.
3. When it returns to the Appointment dialog, please click Save & Close button. See screenshot:

Part 4: Use the VBA code for sending the Schedule Recurring Email
1. Please press Alt + F11 to open the Microsoft Visual Basic for Applications dialog.
2. Double click on Project1 > Microsoft Outlook Object > ThisOutlookSession in the left pane. See screenshot:
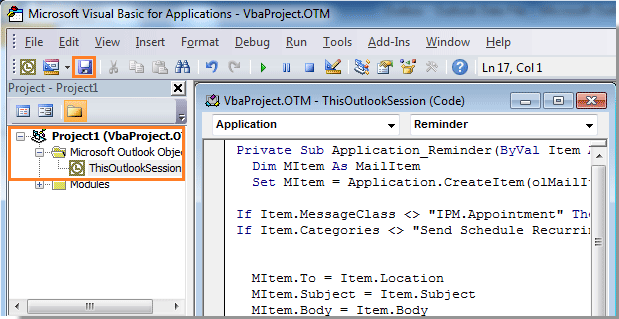
3. Copy and paste the following VBA code to the VBA editor. And then click Save button.
VBA: sending schedule recurring email
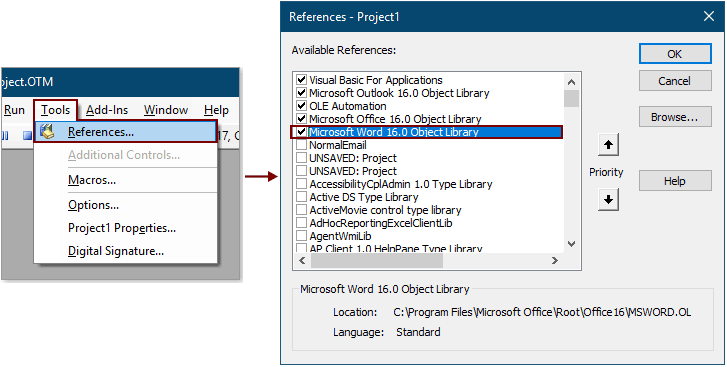
Private Sub Application_Reminder(ByVal Item As Object) 'Updated by Extendoffice 20200522 Dim xMailItem As MailItem Dim xItemDoc As Word.Document Dim xNewDoc As Word.Document Dim xFldPath As String On Error Resume Next If Item.Class <> OlObjectClass.olAppointment Then Exit Sub If Item.Categories <> "Send Schedule Recurring Email" Then Exit Sub Set xMailItem = Outlook.Application.CreateItem(olMailItem) Set xItemDoc = Item.GetInspector.WordEditor xFldPath = CStr(Environ("USERPROFILE")) xFldPath = xFldPath & "\MyReminder" If Dir(xFldPath, vbDirectory) = "" Then MkDir xFldPath End If xFldPath = xFldPath & "\AppointmentBody.xml" xItemDoc.SaveAs2 xFldPath, wdFormatXMLDocument ' wdFormatXML Set xNewDoc = xMailItem.GetInspector.WordEditor VBA.DoEvents xNewDoc.Application.Selection.HomeKey xNewDoc.Activate xNewDoc.Application.Selection.InsertFile FileName:=xFldPath, Attachment:=False With xMailItem .To = Item.Location .Recipients.ResolveAll .Subject = Item.Subject .Send End With Set xMailItem = Nothing VBA.Kill xFldPath End Sub 4. Click Tools > References to open the References - Project dialog. In the dialog, check the Microsoft Word Object Library option and click the OK button.
5. Press the Alt + Q keys at the same time to close the Microsoft Visual Basic for Applications window.
When the Reminder popping up, the email will be automatically sent to the recipients which you have typed in the Location field in the first part. Then click Dismiss in the Reminder dialog. And the email will be sent recurring every day in this time. See screenshot:

Note: The VBA code was successfully tested in Outlook 2010 and the later versions.
Easily send schedule recurring emails in Outlook with an amazing tool
For many Outlook users, the above method is too tedious to be handled correctly. Here highly recommend the Schedule auto send feature of Kutools for Outlook. With this feature, you can easily create multiple recurring emails, and schedule these emails to send regularly at daily, weekly, monthly or yearly intervals as you need. Please do as follows to get it done.
Go to download Kutools for Outlook and have a try.
1. Click Kutools > Schedule auto send > Create auto send schedule.

2. Then a message window is opening, and you need to:
2.1) Select the email recipients in the To, Cc or Bcc fields as you need, and then fill in the email subject;
2.2) Compose the email body;
2.3) Click Recurrence under the Kutools Recurring tab. See screenshot:

3. Now the Emails Recurrence dialog box pops up, you need to specify the recurring time, recurring pattern and the range of recurrence for the email, and then click the OK button.

4. Now it returns to the message window, click Save & Close button to save the recurring settings and close the window.

Tips: You can repeat the above step 1 to 4 to create multiple recurring emails as you need.
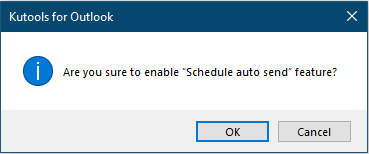
5. Now turn on the feature by clicking Kutools > Schedule auto send > Enable.

6. In the opening Kutools for Outlook dialog box, click OK.
After finishing the above settings, the recurring emails will be sent automatically when the specified date and time is reaching.
Note: You can easily manage your recurring emails as follows.
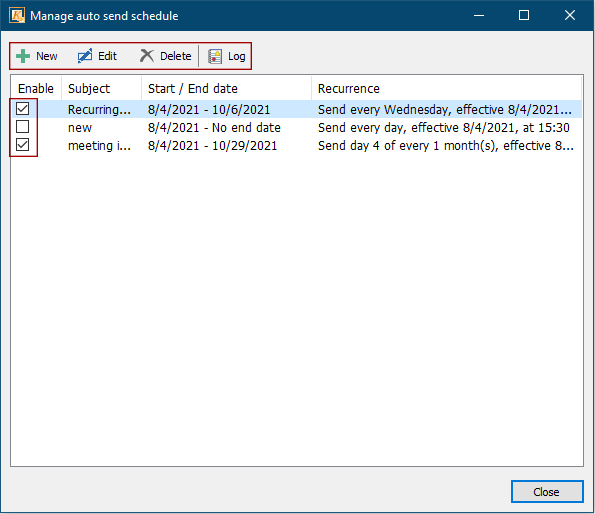
1. Click Kutools > Schedule auto send > Manage auto send schedule.

2. In the Mange auto send schedule window, you can create new recurring email, edit, delete, turn on or off an existing recurring email as you need. Or you can click the Log icon to view the sending history of the recurring emails.
Click to know more about this feature.
Kutools for Outlook includes 100+ powerful features for Microsoft Outlook. Free to try with no limitation in 60 days. Download now!
Kutools for Outlook - Brings 100 Advanced Features to Outlook, and Make Work Much Easier!
- Auto CC/BCC by rules when sending email; Auto Forward Multiple Emails by custom; Auto Reply without exchange server, and more automatic features...
- BCC Warning - show message when you try to reply all if your mail address is in the BCC list; Remind When Missing Attachments, and more remind features...
- Reply (All) With All Attachments in the mail conversation; Reply Many Emails in seconds; Auto Add Greeting when reply; Add Date into subject...
- Attachment Tools: Manage All Attachments in All Mails, Auto Detach, Compress All, Rename All, Save All... Quick Report, Count Selected Mails...
- Powerful Junk Emails by custom; Remove Duplicate Mails and Contacts... Enable you to do smarter, faster and better in Outlook.


How To Set Up Automatic Email Send In Outlook
Source: https://www.extendoffice.com/documents/outlook/1567-outlook-send-schedule-recurring-email.html
Posted by: sumnerfecied1981.blogspot.com
0 Response to "How To Set Up Automatic Email Send In Outlook"
Post a Comment